

A supplier or logistics account can bring colleagues in as team members. Each member gets their own sign-in, works inside your company on BSO, and sees only the areas you allow. Members are managed on the Team tab of My account.
The Team tab appears on accounts that hold the supplier or logistics role; a buyer-only account does not have one. Team seats come with a plan: without an active plan for that role the Team tab shows a note, Team seats come with a supplier plan (or logistics plan), and a Choose plan button instead of Invite member. See Switch between roles for roles and Your plan for plans.
Before you start
- A supplier or logistics role on your account, with an active plan for that role (without one the Team tab only offers Choose plan).
- The colleague's work email address, first name and last name. The address must not already have a BSO account.
Open the Team tab
In My account, click "Team" in the list on the left. The table lists every member with their role, access, status and when they were last updated. Under the table, "Seats used" shows how many of your seats are taken, next to "Add seats". If you hold both the supplier and the logistics role, a switch above the table picks which team you are looking at.
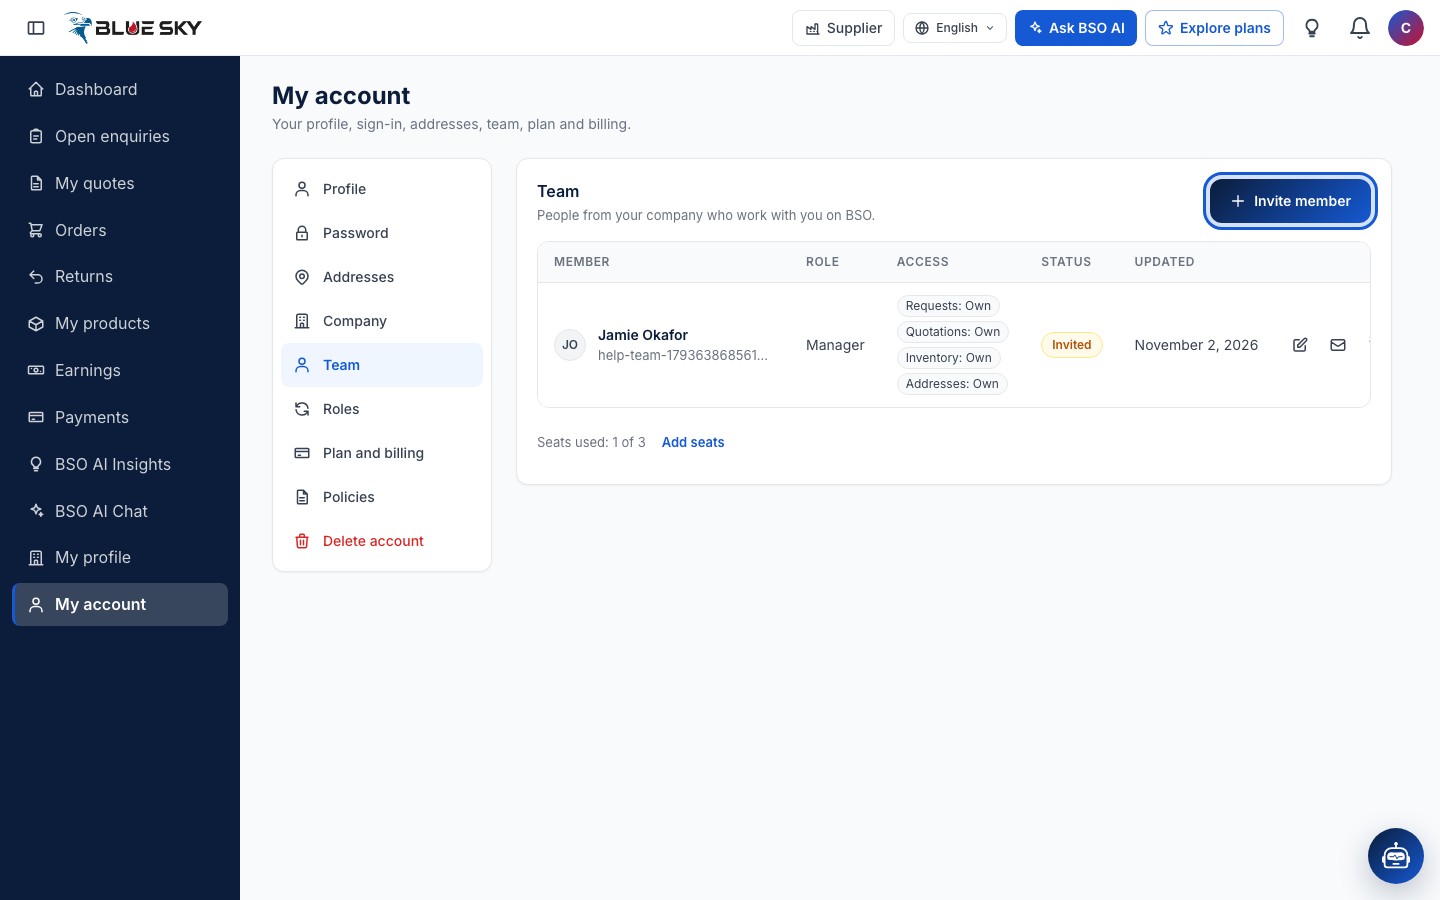
Click Invite member
Click "Invite member". The dialog "Invite a team member" asks for "Email", "Role", "First name", "Last name" and an optional "Message" for the invitation email; "Company" is filled in with yours.
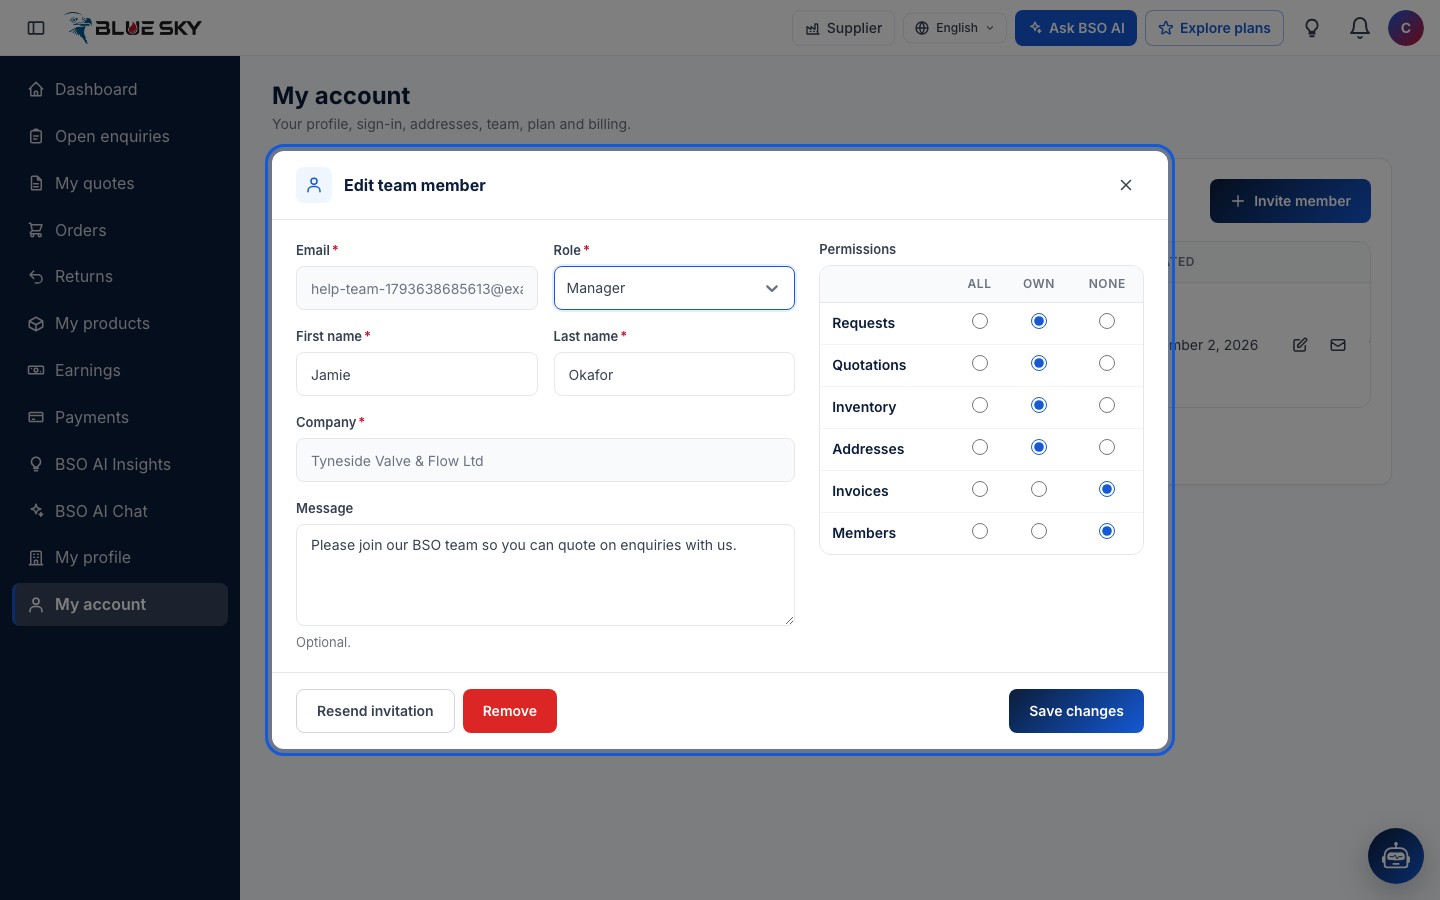
"Role" is a preset: "Administrator" (everything), "Super manager", "Manager" or "Custom". Picking one fills the permission table on the right; changing any line in the table turns the role into "Custom".
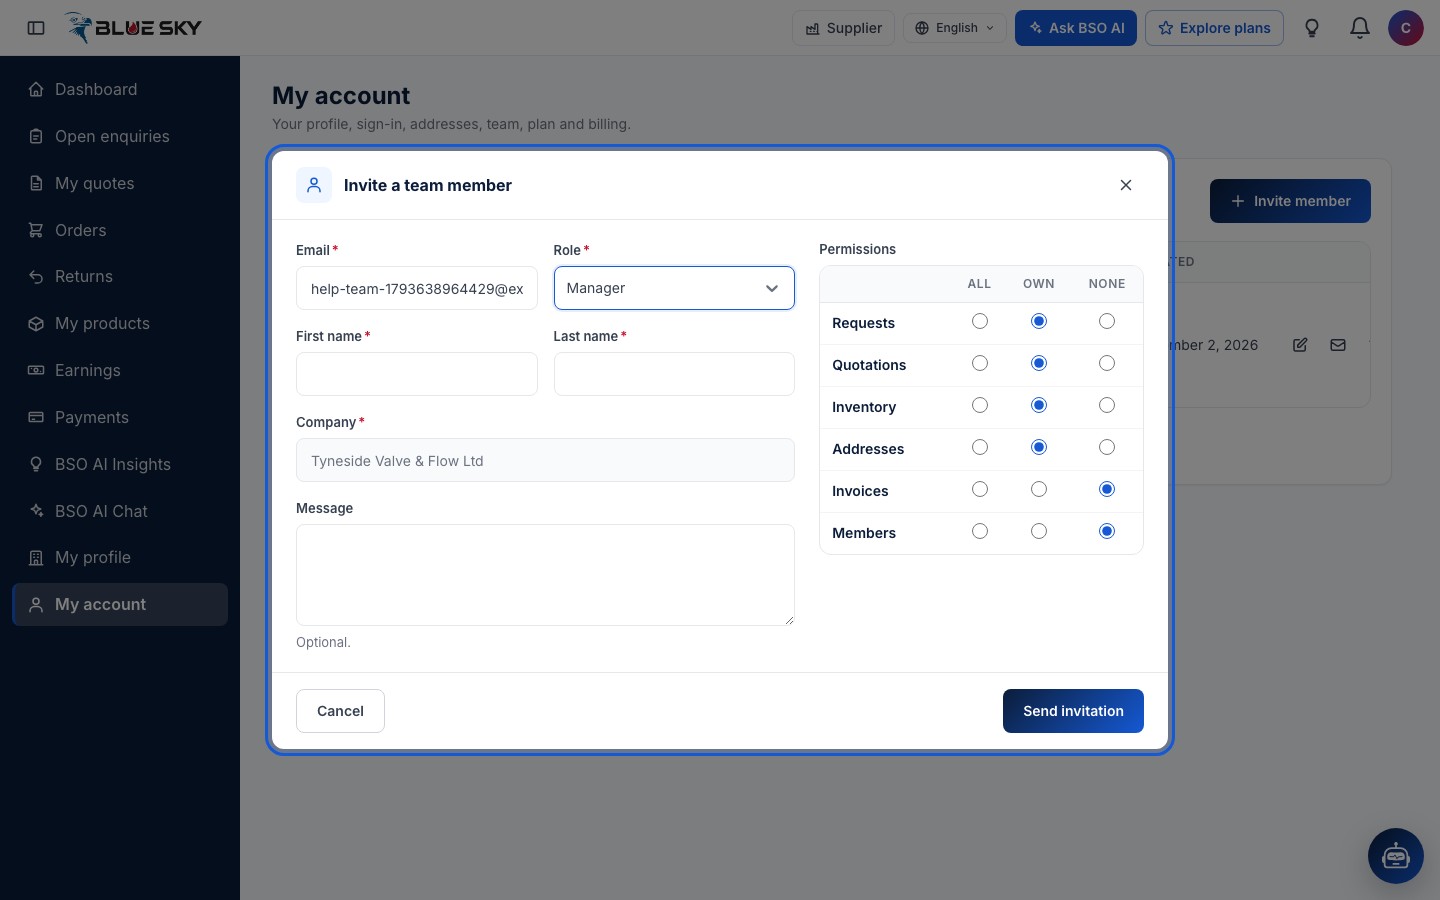
Set the permissions
The table has one line per area: "Requests" (enquiries), "Quotations", "Inventory" (products), "Addresses", "Invoices" and "Members", each set to All, Own or None. All means every record of the company, Own means only the records the member created, None hides that part of the dashboard from them. Fill in the email and names, then click "Send invitation".
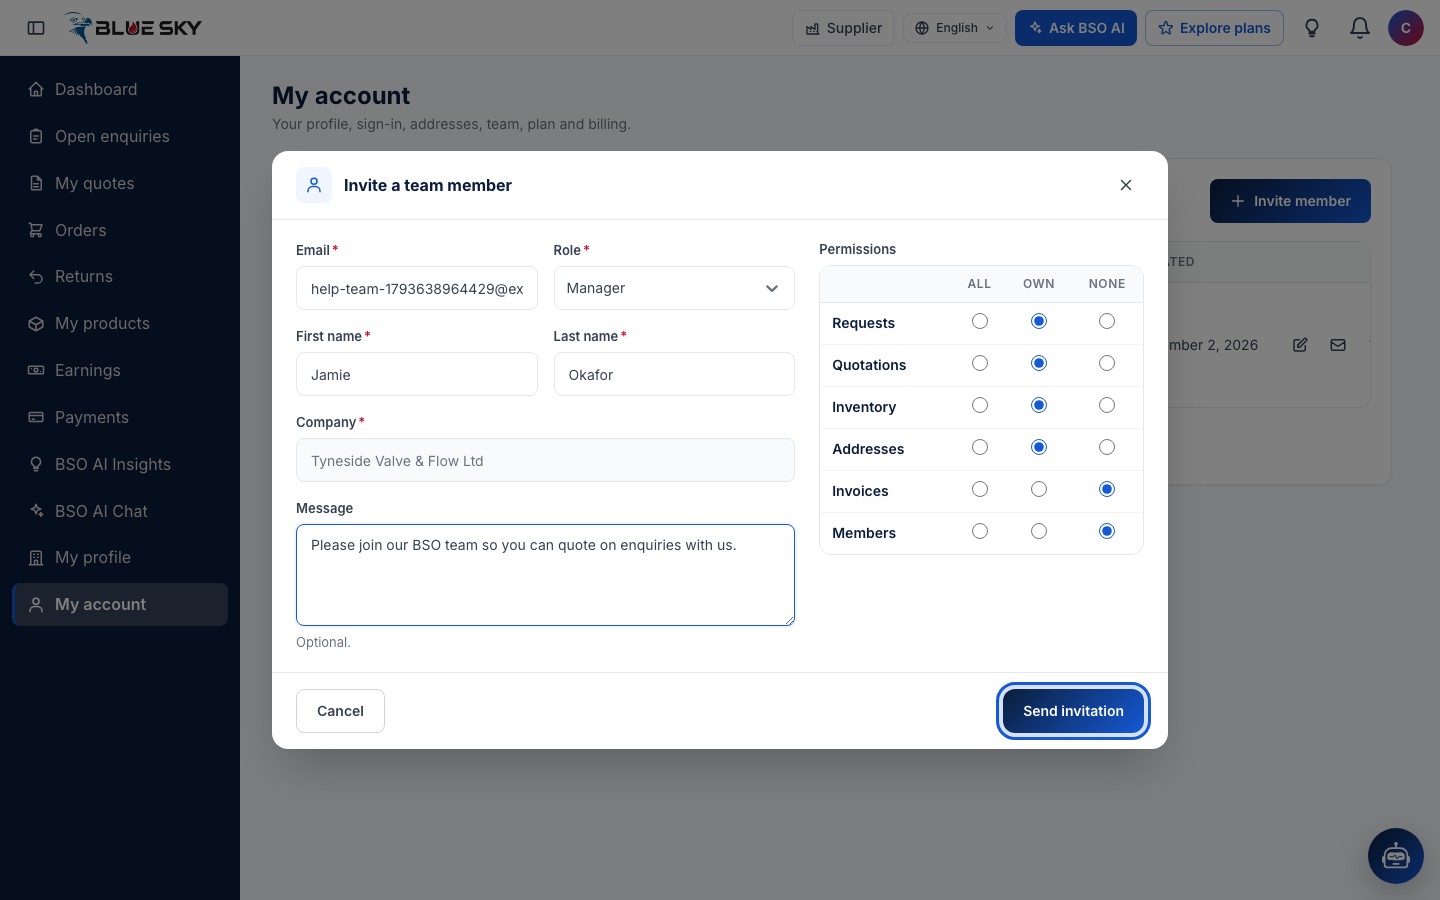
A member with Members set to None cannot see the Team tab; with Invoices set to None they do not see Earnings or Payments.
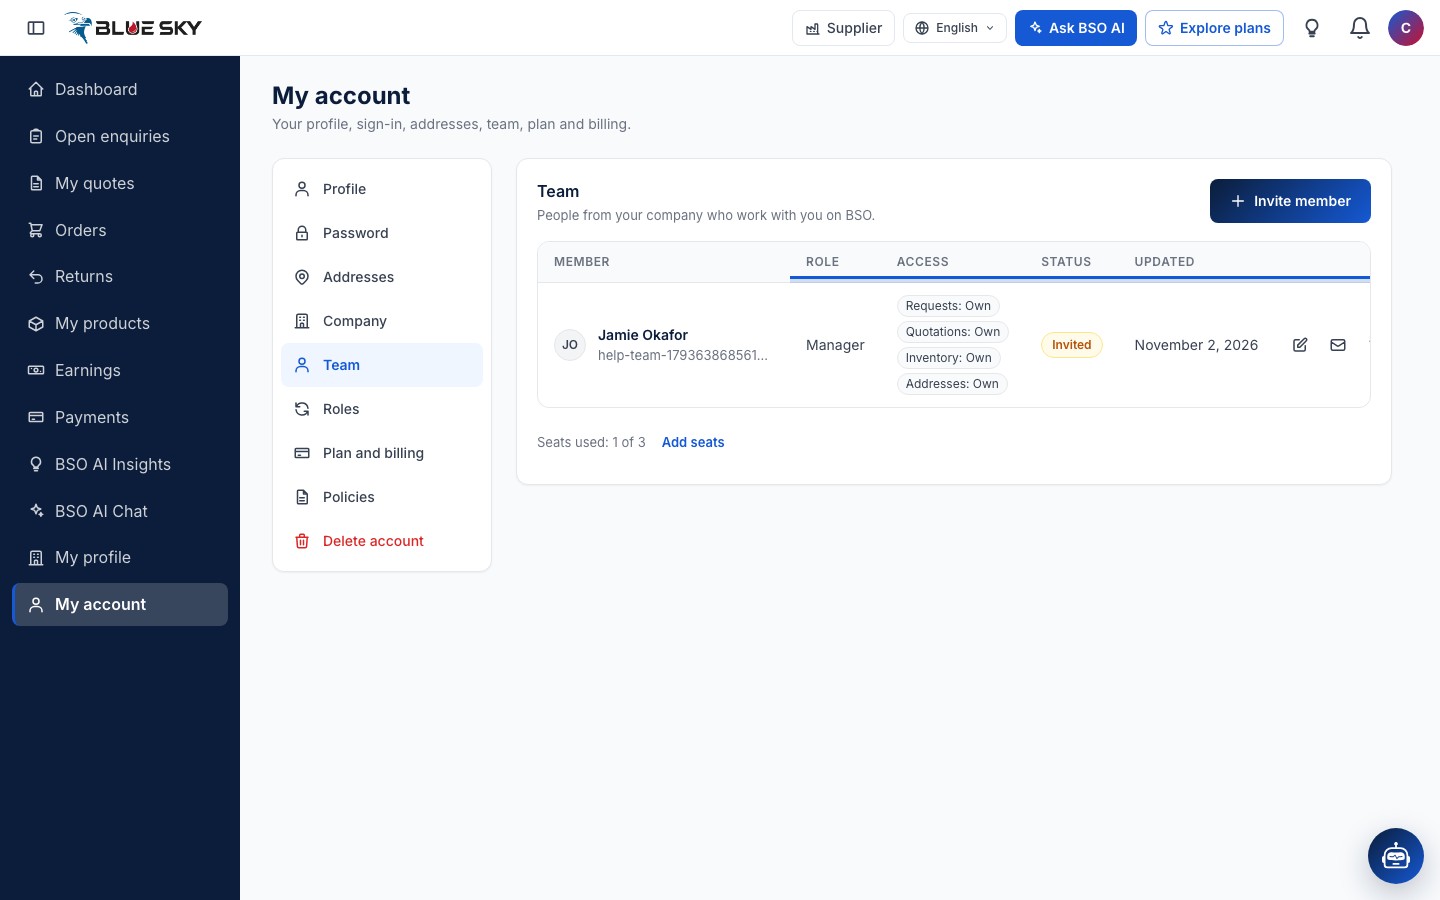
The invitation is on its way
The member appears in the table with the status Invited. They receive an email with a link to accept or reject the invitation and set their own password; the link is valid for 7 days. They cannot sign in until they accept. Once they do, the status changes to Active.
Edit, resend, suspend or remove a member
Click a row (or the pencil) to open "Edit team member": change the role and the permissions and click "Save changes". While an invitation is pending the dialog offers "Resend invitation"; for an active member it offers Suspend (and Activate again later). "Remove" deletes the member's sign-in; they can be invited again later.
Good to know
- Every team starts with the same number of seats, whatever the plan; the Seats used line shows how many you have and how many are taken. When they are all taken, "Add seats" buys more at the price per seat shown in that dialog, paid by card.
- Members see your company details read-only and your plan under Plan and billing, but cannot change either or add roles to the account.
- You can also ask BSO AI to prepare an invitation; the same approval card appears before it is sent.
Related guides
Still stuck? We are here.
Open BSO AI Chat inside the platform, or email the support team. Monday to Friday, 07:00 to 17:00 UK time.